Showing posts with label short nails. Show all posts

Sunday, October 30, 2011

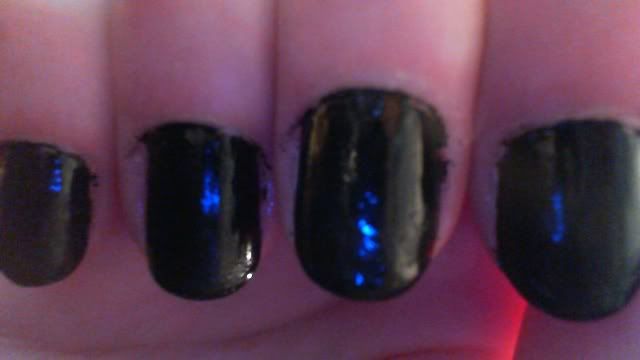
Slime Manicure

Hey guys! So I had a Halloween video tutorial to share. I was super excited about it, but I've been really having a hard time getting it to record. >.< I'll have to keep trying, it's really neat anyway, even if it's not in time for Halloween.


So in the mean time.... SLIME!


I think this oozing design would look great in other colors, too. Red would make great scary blood drips, and a bright lime green would make great toxic waste. :)


I really like this design for short nails. The vertical lines help make your nails appear longer.


That's all for now, Happy Halloween everyone! Stay safe. :)

Monday, August 1, 2011

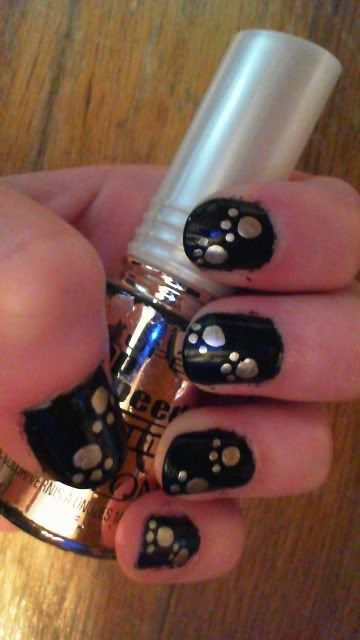
Paw Print Tutorial - Manicure

This one's for all the animal lovers out there! I'm a huge dog person and I'm in the process of getting a few rats. So in honor of our furry friends, here's a super easy, generic paw print manicure. :)


First, I started off with just a plain black background, but any color will do.


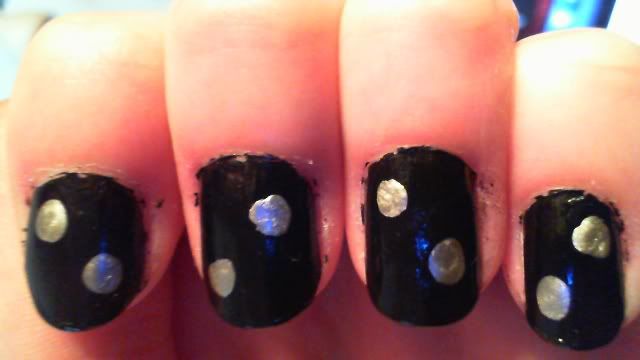
Next, make two or more large circles. I used the nail polish's brush for this part, but you can also use a nail art brush or toothpicks, which ever you're most comfortable with.


Finally, I added three little dots for the toes. Realistically, cats and dogs would have four dots, but I'm in the mood for a cartoony look. ;)


Finish off with a clear top coat and you're done! I think this one is great for short nails and pedicures, but I think it also works for long nails if you add more paws. And this pattern will work well for any colors so go ahead and mix it up! :)


(My dog, Jake. woof woof!)

Monday, July 4, 2011

4th of July Manicure

Happy 4th of July everyone!!!

So it's been a while since I've uploaded anything and even looonger since I've done a tutorial. So why not do one dedicated to the United States of America? Look at what manicure I'm sporting today! :)


Ok, first star off with a clear base coat of polish and paint your nails red.


Next, use either a toothpick, a striping brush, or thin paintbrush and paint white vertical stripes. If you're really careful, you can use the nail polish brush itself, it's just much more difficult.
*Optional* Paint your nails white with red stripes. :)


Next, you're basically going to paint blue french tips. Just use your blue polish and paint a smooth curved line at the tips of your nails.


Now to finish it all up, add some stars! Just make small white dots along the blue area. I did five stars on each finger, so there are 50 stars in total!


And it's that easy! Just finish up with a clear top coat to protect your patriotic manicure. I think this manicure looks great on short nails, but I'm sure it'll be fabulous on long nails too! :)

Sunday, March 20, 2011

MARCH MADNESS!!! (Basketball Manicure)

Ok, so I'm not really much of a sports fan, but I make an exception for men's college basketball. I looooove Syracuse! I'm actually watching the Syracuse vs. Marquette game in the 3rd round of the NCAA's as I'm typing. :)

So in honor of my favorite sports team, I just got done painting some basketballs on my nails!


Great thing about this manicure is that it is FANTASTIC for short nails! I actually think this is one of those manicures that actually looks better on short, broad nails than on long nails.

Anyway, that's it for me. There's about 11 more minutes in the game, so I'm outta here!

LET'S GO ORANGE! LET'S GO!!!

Friday, December 24, 2010

Christmas Present Manicure

Well, Santa's getting ready to stop by in a few hours, and I just finished wrapping all my presents. So why not celebrate with some Christmas present nails!

I was originally going to do red with green ribbon, but I didn't want to get too matchy-matchy. So I changed my mind and went with gold ribbons instead, and glad I did! I also think this is ideal for short nails, especially if their on the broad side. :)


Only bad thing is that before they were completely dry, I mushed my nails up against my clothes. And to top it off, the gold didn't photograph very weel. :(

Oh well, you get the idea. :)

Merry Christmas!

P.S. Between the last post and this one, one of my nails broke and it's super painful. It got cut off really short, so my finger is really sore because of it. My nails have been really brittle lately, even with everything I do to keep them strong. So I think I'm going to go back to short nails for a while until I can strengthen them up. So no more long nails for a long while. :(

Friday, December 3, 2010

Candy Canes Manicure

CHRISTMAS TIME!!!

Ok, so it's December now and that means Christmas is right around the corner! Christmas time is my favorite time of year, so expect a lot of themed manicures coming up this month. :D

I decided to start off with something pretty simple. So I wore these candy canes last week. I think they'd look better on long nails, but short nails can pull this off pretty well.

All you have to do is paint you nails white and stripe them with red. And to make them more realistic, alternate between thick and thin stripes.


I used a red, glittery Sally Hansen Nail Art Pen. I don't know if it was just my pen, but I found the red to be SUPER thin. This brand of nail art pens are pretty thin to begin with, but this one was even more watery than my other colors. So it was really hard to make nice clean lines. :(

There are lots of different kinds of candy canes, so experiment around with different designs and colors! :D

Friday, November 5, 2010

Vertical Stripes (Manicure & Pedicures)

So for this post, I decided to feature some striped manicures and pedicures I've done recently. They are a super easy design to do. You can use sharpie, nail art pens, brushes, toothpicks and even the nail polish's brush. It's great for everyday wear and there are so many color possibilities! Also, one of the best things about vertical stripes is that they are great for short, broad nails. They give the illusion that your nails are longer and slimmer than they actually are! This also makes stripes great for pedicures, too. :)


I love black paired with bright colors. So for this manicure I used a black base coat with bright green, pink and yellow stripes. With the contrast against the black, the stripes really popped! They almost looked neon. :)


(sorry about the sideways picture! I couldn't orient it right for some reason...)

For this pedicure, I decided to go monochromatic. I think this was my favorite and most successful striped design. I used a light, medium and dark blue to do the stripes.


And then of course you can never go wrong with a good old fashioned rainbow! It looked great, and was very colorful!

I got a whole bunch of odds and ends to post this month, so look forward to a random November!

Sunday, October 31, 2010

Glow-in-the-Dark Spiderweb & Jack-o-Lantern Manicures

Well, I did a FANTASTIC The Nightmare Before Christmas themed video tutorial. Bad news is that my Windows Movie Maker keeps freezing up at 42% when I go to publish it. Ugh! Anyone know how to fix this?

Until then, I'll have to save that manicure for later. It's not in time for Halloween, but TNBC is fun any time of the year. So to make up for that and the lack of Halloween manicures, I have a double feature for you today! Here are two similar glow-in-the-dark Halloween manicures!

I decided to go with Jack-o-lanterns this year for Halloween. Very simple to do and they look fun! All you need is orange nail polish and a black sharpie or nail art pen.


(excuse the smudges)!!!

Build up a few layers of orange polish so it's nice and opaque. The draw on the little faces. Be creative! It's great practice for when you go to carve your own pumpkins! ;)

But, that's not all! These pumpkins also glow!!! I couldn't get a very good picture of the glowing, and my glow-in-the-dark polish was a little off this year. I think it's time to get a new one. :/


If you want your nails to glow and still be able to see the faces, you need to paint a glow layer after your orange and BEFORE you draw in the faces. This way your design will be on top and you can see it, even in the dark!

Last year I did a similar manicure. Instead, I used white nail polish and a spiderweb design. The principle is still the same though, draw on your design after you put a glow layer down. You can really use any color and any design you'd like! I, personally, think a bat would look awesome... ;)


Good news is that these two manicures work well on short nails, especially the pumpkin one (I dare to say I prefer it)! So fear not short nailed gals, you can rock nail art just as well! :D

So let's end on that note. Happy Halloween to everyone! Stay safe!