Showing posts with label black. Show all posts

Sunday, October 30, 2011

Slime Manicure

Hey guys! So I had a Halloween video tutorial to share. I was super excited about it, but I've been really having a hard time getting it to record. >.< I'll have to keep trying, it's really neat anyway, even if it's not in time for Halloween.


So in the mean time.... SLIME!


I think this oozing design would look great in other colors, too. Red would make great scary blood drips, and a bright lime green would make great toxic waste. :)


I really like this design for short nails. The vertical lines help make your nails appear longer.


That's all for now, Happy Halloween everyone! Stay safe. :)

Monday, August 1, 2011

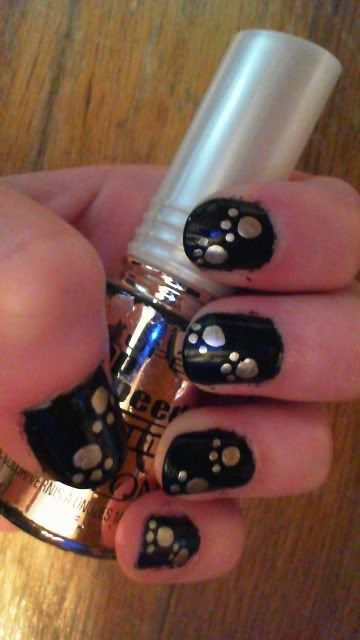
Paw Print Tutorial - Manicure

This one's for all the animal lovers out there! I'm a huge dog person and I'm in the process of getting a few rats. So in honor of our furry friends, here's a super easy, generic paw print manicure. :)


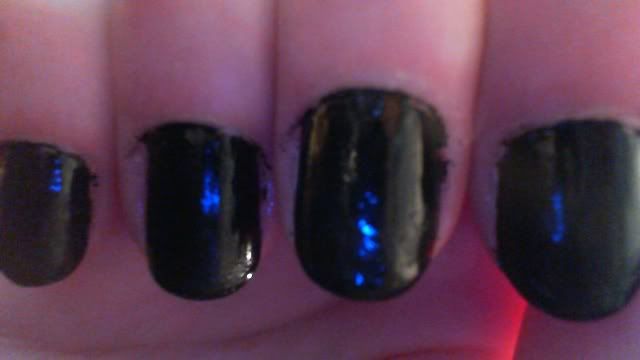
First, I started off with just a plain black background, but any color will do.


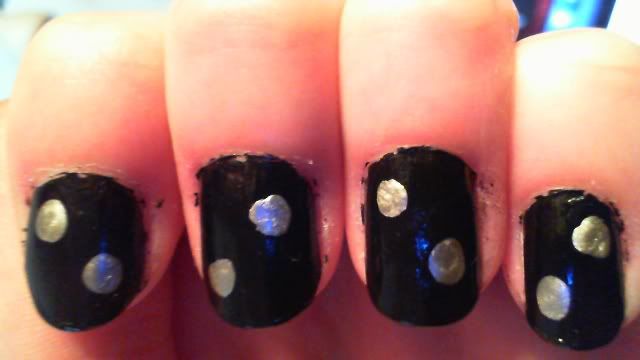
Next, make two or more large circles. I used the nail polish's brush for this part, but you can also use a nail art brush or toothpicks, which ever you're most comfortable with.


Finally, I added three little dots for the toes. Realistically, cats and dogs would have four dots, but I'm in the mood for a cartoony look. ;)


Finish off with a clear top coat and you're done! I think this one is great for short nails and pedicures, but I think it also works for long nails if you add more paws. And this pattern will work well for any colors so go ahead and mix it up! :)


(My dog, Jake. woof woof!)

Tuesday, April 12, 2011

Yin Yang and Piano Manicure

Ok, so this is NOT my design, but it is soooo awesome I just HAD to share! :D


This belongs to YEYUniqueNail over on deviantART. I am totally going to try to recreate this, at least the yin yang part. It looks simple enough.

Oh how useful black and white are. :)

Monday, April 4, 2011

Rainbow Tiger Stripes

Hey guys! Ok, so it's been a while since my last update. I got a couple spring themed manicures in the making, but how about a nice rainbow for now?

Well... rainbow tiger stripes. ;)


Totally reminds me of Lisa Frank! lol :D


Monday, January 17, 2011

Blast from the Past! - Guest Manicures

Oops! Well, I've had these ones stored on my computer for a while... These are from back around the time I was going back and forth to Boston. When my mom and I would go, we would stay with my cousin who live near to Boston. She has three girls, all around the tween age, and every time we'd go down, I'd have to do their nails. :D

So these three manicures are theirs from the last time I went down. They browsed around my website and picked one out that they wanted.

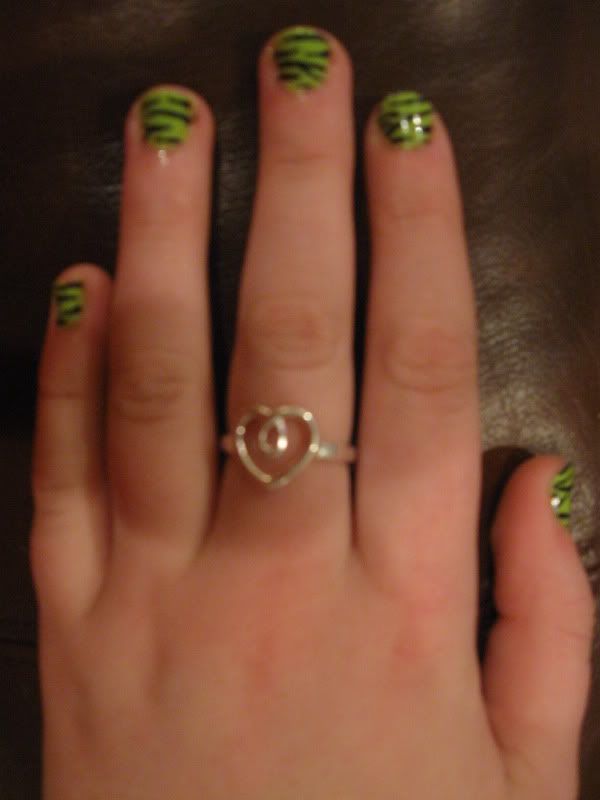
The oldest, Lexi, wanted a lime green zebra print. I think this one turned out to be my favorite. :)


Chase wanted the frog manicure that I did, except with a few creative changes. She decided to have blue frogs instead. :)


Then finally, Eavery wanted the tropical sunset that I did for a pedicure. And if I remember correctly, I also used my glittery glow-in-the-dark polish. :)


Friday, November 12, 2010

TWLOHA Manicure

Today is the To Write Lover On Her Arms day on Facebook! This organization does wonderful work, so to show my support, today's manicure is dedicated to TWLOHA! I decided to paint awareness ribbons in the four colors they represent.


I also made a quick little video, so take a look!


Saturday, November 6, 2010

Spots and Polka Dots (Manicure)

So since I did stripes the other day, I thought it would be appropriate to show spots some love today. Here are some spotted designs I did a while ago. :)

First up is some black and white polka dots. I loved how these turned out, it looked so nice!


The only hard part about this design is that it can be very time consuming. It can also be tricky to get the dots evenly spaced, but it just takes lots of practice.

Toward the end of summer, I also did this blue leopard print manicure.


To do this, I started off with a light blue base coat. Next, randomly place some dark blue dots of different sizes. After they're all dry, take a sharpie, nail art pen or a brush to paint little squiggly "c" shapes around the blue dots.

So that's it for today. I'm off to Boston early tomorrow morning, so I don't know how long it will be until I do another post. I've been saving some reviews/hauls about some nail polishes two of my friends gave me, so maybe those will be next. :)

P.S. My nails have grown SUPER long lately, I'm talking almost a centimeter beyond my fingertips. They look beautiful, I love them! They're the longest they've ever been in my life. Bad news is that I have to take off all my nail polish off because I need an MRI on Monday. My nails tend to break if they're this long and don't have polish to protect them, so I'll be filing them down. Boo! :( But I figure if I file them a little it's better than if they break and have to file them a lot. Good news is that I took an awesome picture of the manicure I'm wearing now so you can see it and my nails around Christmas time! Can't wait to show off this one, it looks so cool! :D

Friday, November 5, 2010

Vertical Stripes (Manicure & Pedicures)

So for this post, I decided to feature some striped manicures and pedicures I've done recently. They are a super easy design to do. You can use sharpie, nail art pens, brushes, toothpicks and even the nail polish's brush. It's great for everyday wear and there are so many color possibilities! Also, one of the best things about vertical stripes is that they are great for short, broad nails. They give the illusion that your nails are longer and slimmer than they actually are! This also makes stripes great for pedicures, too. :)


I love black paired with bright colors. So for this manicure I used a black base coat with bright green, pink and yellow stripes. With the contrast against the black, the stripes really popped! They almost looked neon. :)


(sorry about the sideways picture! I couldn't orient it right for some reason...)

For this pedicure, I decided to go monochromatic. I think this was my favorite and most successful striped design. I used a light, medium and dark blue to do the stripes.


And then of course you can never go wrong with a good old fashioned rainbow! It looked great, and was very colorful!

I got a whole bunch of odds and ends to post this month, so look forward to a random November!

Sunday, October 31, 2010

Glow-in-the-Dark Spiderweb & Jack-o-Lantern Manicures

Well, I did a FANTASTIC The Nightmare Before Christmas themed video tutorial. Bad news is that my Windows Movie Maker keeps freezing up at 42% when I go to publish it. Ugh! Anyone know how to fix this?

Until then, I'll have to save that manicure for later. It's not in time for Halloween, but TNBC is fun any time of the year. So to make up for that and the lack of Halloween manicures, I have a double feature for you today! Here are two similar glow-in-the-dark Halloween manicures!

I decided to go with Jack-o-lanterns this year for Halloween. Very simple to do and they look fun! All you need is orange nail polish and a black sharpie or nail art pen.


(excuse the smudges)!!!

Build up a few layers of orange polish so it's nice and opaque. The draw on the little faces. Be creative! It's great practice for when you go to carve your own pumpkins! ;)

But, that's not all! These pumpkins also glow!!! I couldn't get a very good picture of the glowing, and my glow-in-the-dark polish was a little off this year. I think it's time to get a new one. :/


If you want your nails to glow and still be able to see the faces, you need to paint a glow layer after your orange and BEFORE you draw in the faces. This way your design will be on top and you can see it, even in the dark!

Last year I did a similar manicure. Instead, I used white nail polish and a spiderweb design. The principle is still the same though, draw on your design after you put a glow layer down. You can really use any color and any design you'd like! I, personally, think a bat would look awesome... ;)


Good news is that these two manicures work well on short nails, especially the pumpkin one (I dare to say I prefer it)! So fear not short nailed gals, you can rock nail art just as well! :D

So let's end on that note. Happy Halloween to everyone! Stay safe!

Wednesday, October 13, 2010

Orange Spiderweb Pedicure

Just a quick little update here, just to put out some ideas... I've got another little Halloween design for you! Basically it's a french manicure, but orange and black. Then I added a couple cute little spiderwebs to finish it all up. :)


I have another spiderweb design to show you later this month, but I might make it into a video tutorial. I think it's my favorite manicure I've ever done, so look forward to seeing that one! :)

Friday, October 1, 2010

Halloween Skull Manicure

Hey guys! It's finally October, my favorite month! I have a few surprises in store for later, but for now, let's kick it off with a bang!


I made my first video tutorial! I'll be showing you how to make these adorable, spooky little skulls. They're perfect for Halloween later this month, or if you want to explore your gothy side. ;)


Enjoy the video and please leave some feedback! :D

Friday, September 24, 2010

Goodbye Summer (Tropical) Pedicure

Well, summer is over and we're heading into colder weather. Fall is my favorite season, but this summer was pretty nice for me, weather-wise anyway. So as a final goodbye to summer, I decided on a tropical pedicure.


This one was very difficult to photograph for some reason, my camera couldn't pick up the colors very easily. I did a gradient of pink, orange and yellow for the sunset background, with black palm trees and seagull silhouettes. It turned out as a nice, relaxing adios to summer.

I'm really looking forward to October though; it's my favorite month so expect lots of Halloween themed manicures coming from me! And as we get closer to Halloween, I'll share with you my all time favorite manicure I've ever done. :D

P.S. You may have noticed some minor changes... I flipped the layout sideways and added a label section so you can search posts by topic. I thought this might make searching older posts easier. ALSO! Please don't forget to vote in the poll! Still 15 days left! :)

Sunday, August 29, 2010

Sinful Colors Haul

I'm real tired, but I wanted to do something. So just a quick post:


My mom was out and about and wherever she was, there was a huge nail polish sale! So she came home with a pretty nice Sinful Colors haul! Super super cheap, and the colors are great! We've tried them all so far except the white, purple and opal colored ones.


The blue is peacock blueish, but in some lights, it turns a teal green. It's also pretty shear, along with the opal. The purple is really hard to photograph but it's a nice mid-toned purple. The hot pink and fuchsia are super super bright and pop very nicely. The dark red is perfect for a Christmas red and has a bit of a shimmer to it, but not too much. Then the black and white are just like any other black and white. :P

Thursday, June 17, 2010

Black French Tip & Flower Pedicure

Yikes! Sorry it's been so long guys! I'll save the full explanation for a later date, but to sum it up:

1) Busy semester
2) Illness
3) Laziness

Anyway, let's jump right into the post now! Summer is perfect for pedicures. Good weather means open-toed shoes and bare feat. It's super important to take better care of your feet this time of year since people will see your toes now! So in honor of summer, here is a classy, simple and clean looking pedicure.


This pedicure is the same as a traditional French manicure, except I substituted the white for black. I love black tips; it's a nice modern touch but still conservative for the workplace. To finish it off, I added two small white flowers on my big toes only.


If you don't know how to do a french manicure, there are dozens of tutorials out there, especially on Youtube, so I won't explain how to do this one. This is just to give you an idea. :)

Wednesday, January 27, 2010

Labyrinth Inspired Manicure - FAIL!

So this is definitely not my best nail art... ok, fine. I failed completely. It's hideous, lumpy and just around bad. I can't imagine it would look good one anyone's nails. But I'm going to share it with you guys anyway so that it might inspire someone to build upon it and make it work. Don't say I didn't warn you!

I love the movie Labyrinth, I've been obsessed with it lately. So I wanted to do a manicure inspired by it. The colors that come to mind are purples and blues... and glitter!


So I got the brilliant idea to take those colors and mix them all together to look cloudy and mysterious...


...yuk. But, oh wait, it gets worse when I try to add those little floating crystal balls...


...
Yeah... I told you it was ugly!

I was really disappointed. It looked so much cooler in my mind... I'll probably attempt this one again some time in the future, but I'll used different methods. Anyway, I hope some good came out of this and someone finds a way to build off of it!

Saturday, January 23, 2010

Black and Blue Wavy Manicure

I wanted to play around with the Blue Sally Hansen nail art pen some more. It was really interesting that it came out matte... So here's what I came up with, nothing special.


Basically what I did was paint my nails black, and draw in little squiggles. I fulled in the bottom half and toped it with a clear coat of nail polish.

I was a little disappointed that started to give a crackle look. You can see it best on my thumb and index finger. It even crackled a little worse after I took the picture. I don't know what that was all about, so I'll have to fiddle around with it a bit more.


P.S. Does this remind anyone else of the Backstreet Boys? XD

Wednesday, January 20, 2010

Zebra Print Manicure

Well I got a new betta fish last night! He's still looking a little sickly, but he seems to be getting better now that he's all settled in his new tank. It was so sad going to Petsmart... all those poor mistreated betta fish... :(

Well, at least this little guy's got a nice caring home now. I did a special manicure inspired by his fins! Unfortunately, I can't seem to find the cord that plugs my camera into the computer. I just had it yesterday, dangit!

So in the mean time, let's tide you over with another animal!


Just a simple zebra print. I appologize for the crappy photo quality. Not to mention my cheap clear coat smeared the black a bit... :(

This one is really easy to make. All you need is black and white. Clear base coat, then a coat of white. You may need more than one coat if it's not opaque enough. Paint in random black stripes and top it off with a clear coat
I used a nail art brush to paint in the black stripes. If you don't have one, a thin paint brush or black nail art pen will work just as good. Sharpies also work as well. Be careful though if you use a sharpie. The polish must be completely dry or the sharpie will drag the polish and ruin your manicure. Also, you may need to go over the stripes more than once to make it completely black. Normal nail polish is always a better choice; use sharpies only if you don't have the necessary supplies.

Just a few more tips. If you don't have a nice clear polish, like Seche Vite, you run the risk of smearing detailed designs like this. However, Seche Vite is a tad expensive. If you're using a cheaper clear coat, paint it on thick and it will be far less likely to smear.

Remember to vary the thickness of each stripe. It will help you make a more realistic pattern. Also, if you're uncomfortable painting on your own, google up a zebra print to use as a reference.

(Phew! that was a long one! Sorry about the text intensive post!)

Tuesday, January 19, 2010

Checkerboard Manicure


(Excuse the note I wrote on my hand!)

This was my first nail art design since I decided to create this blog, back at the end of October 2009. Just a simple checkerboard pattern. Unfortunately, this is the only photo I have of this design. To create it, I used a red nail polish for the base coat. I then drew the checkerboard pattern out with a black Salley Hanson Nail Art Pen that my mom gave me for the upcoming Halloween.

Questions? Leave me a comment! I would love to see you guys do different color variations of this!