Showing posts with label green. Show all posts

Sunday, October 30, 2011

Slime Manicure

Hey guys! So I had a Halloween video tutorial to share. I was super excited about it, but I've been really having a hard time getting it to record. >.< I'll have to keep trying, it's really neat anyway, even if it's not in time for Halloween.


So in the mean time.... SLIME!


I think this oozing design would look great in other colors, too. Red would make great scary blood drips, and a bright lime green would make great toxic waste. :)


I really like this design for short nails. The vertical lines help make your nails appear longer.


That's all for now, Happy Halloween everyone! Stay safe. :)

Sunday, May 8, 2011

Fun Dip Inspired Manicure

Happy Mother's Day!!!

We've been having a great family weekend so far. My mom and I went to Mass last night and we totally cried when they sang a really pretty song about moms. We watched Black Swan and today my Dad's cooking some ribs for dinner. He's been smoking them in the smoke house all day. I can't wait! :)

Anyway, one of the things I remember from my childhood is that every time my Mom brought my brother and me to the movies (back when it was still cheap *tear*) she would give us fun dip!


Omg, do you guys remember this!?

My brother's favorite was the blue that turns green when you lick it. My favorite flavor was always grape, but that color changing one was soooo cool. So that's the inspiration for today's manicure!


It's not a great picture, but I used a blue polish with green tips and the marshmallow glitter that I talked about a few posts ago.

Dude, my Mom made my childhood soooo awesome. I miss being a kid. :)

I love you mommy! <3

Tuesday, April 26, 2011

Claire's Nailpolish Reviews

Wow, ok so I've had these pictures in storage forever! Almost a year ago, my friend Noora gave me a bunch of nail goodies for an early birthday present. They were pretty unique, I don't really have anything like them in my collection so I was pretty excited to test them out. :)


First up were these really cool bi-colored nail polishes. They're a really neat idea; they're suppose to paint on stripes of each color. Just don't shake the bottles!


Unfortunately, it didn't really work too well for me... I thought the watermelon pink and green glittery one didn't work because my friend shook it up a little. But the dark green and hot pink one didn't work too well either. It made a gross dark green/brown colors. I think it's because the brush only reaches down to the think black layer; it's too short to reach into the pink. Such a bummer cuz it's a great idea. :(

My favorite out of the bunch were the scented isparkle glitter top coats. I was really surprised actually, they smelled much better than I thought! I was expecting icky nail polish smell with some grape and marshmallow thrown in there. But they actually smelled pretty good, especially after drying! :)

The grape smells very grapey, like a grape Popsicle or lollipop. And I think the marshmallow smells more like Fluff than a marshmallow, but was really yummy anyway. :) (I know Fluff is made out of marshmallow but they DO smell different!)


The only bad thing about these glitter polishes is that you can't put a top coat over it or it will cover up the smell. On it's own, it chips off pretty easy. However, it only chips off the glitter coat and the color underneath stays fine. Kinda weird, huh? Oh! And you'll get lots of glitter on your fingers from holding the brush. lol :)


She also gave me a shimmery green nail polish. Here I am wearing it with a gold fluer de lis drawn over the ring finger nail.


I'll save the gold nail art pen for a later review. Another friend of mine gave me a gold Sally Hanson nail art pen, so I'd like to do a nice compare and contrast of the two.

Monday, April 4, 2011

Rainbow Tiger Stripes

Hey guys! Ok, so it's been a while since my last update. I got a couple spring themed manicures in the making, but how about a nice rainbow for now?

Well... rainbow tiger stripes. ;)


Totally reminds me of Lisa Frank! lol :D


Monday, March 7, 2011

Mardi Gras Manicure

Happy Mardi Gras!

Very simple manicure today. Basically it's just french tips with fun Mardi Gras colors! :)

I started off with a purple base coat and added green tips. Then I drew a thin gold line using the gold Sally Hansen Nail Art Pen my friend Sarah gave me for Christmas. And just for fun, I added cute little green star rhinestones on my ring fingers. :)


I don't know why purple is always so hard for me to photograph! It always comes out too blue. Darn! Well, just know that in real life it's a rich, royal deep purple.

Anyway, for those who celebrate it, have a fruitful Lenten season! God Bless!

Saturday, January 29, 2011

60's Inspired Nails

So my nails are finally starting to get long again! Yay! I'm starting on some Valentine's Day designs so look for them next month. In the meantime, here's a really fast and easy design. :)


I LOVE golden oldies; 1960's music rocks! My favorite oldies song is California Dreamin' by The Mamas And The Papas. Last year at school I'd put on some oldies while doing my art assignments and I was inspired to try some 60's colored nails.


I started off with a pea green base. Next, I added some pink, white and orange polka dots and be sure to make them fairly large because you'll need some room!


Once you have your polka dots dry, take the green polish again and put a small dot inside each of the polka dots. This makes your polka dots look like groovy little circles!


Let your nails dry and paint a top coat over it. It'll help even out your nail polish if you made your green dots too thick like I did. Ooops! :)

Monday, January 17, 2011

Blast from the Past! - Guest Manicures

Oops! Well, I've had these ones stored on my computer for a while... These are from back around the time I was going back and forth to Boston. When my mom and I would go, we would stay with my cousin who live near to Boston. She has three girls, all around the tween age, and every time we'd go down, I'd have to do their nails. :D

So these three manicures are theirs from the last time I went down. They browsed around my website and picked one out that they wanted.

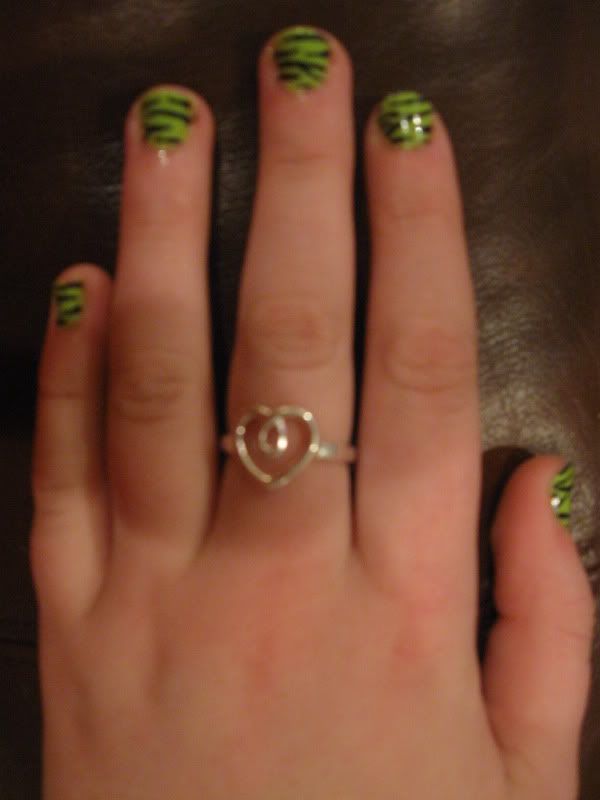
The oldest, Lexi, wanted a lime green zebra print. I think this one turned out to be my favorite. :)


Chase wanted the frog manicure that I did, except with a few creative changes. She decided to have blue frogs instead. :)


Then finally, Eavery wanted the tropical sunset that I did for a pedicure. And if I remember correctly, I also used my glittery glow-in-the-dark polish. :)


Sunday, December 26, 2010

Christmas Tree Inspired Manicure

Well, I hope everyone enjoyed their Christmas! I have a very nice quite day with my family. :)

Anyway, this is what I prepared for today. I decided to go with a stylistic Christmas tree look. It looked really good, all the nail polish was shimmery!


If you didn't see from the last post, my nails broke super short. Bummer! I have one more manicure to post this month, maybe I can eek out two. Either way, I hope you all enjoy the rest of the year! Merry Christmas again, and Happy Holidays!

Friday, December 24, 2010

Christmas Present Manicure

Well, Santa's getting ready to stop by in a few hours, and I just finished wrapping all my presents. So why not celebrate with some Christmas present nails!

I was originally going to do red with green ribbon, but I didn't want to get too matchy-matchy. So I changed my mind and went with gold ribbons instead, and glad I did! I also think this is ideal for short nails, especially if their on the broad side. :)


Only bad thing is that before they were completely dry, I mushed my nails up against my clothes. And to top it off, the gold didn't photograph very weel. :(

Oh well, you get the idea. :)

Merry Christmas!

P.S. Between the last post and this one, one of my nails broke and it's super painful. It got cut off really short, so my finger is really sore because of it. My nails have been really brittle lately, even with everything I do to keep them strong. So I think I'm going to go back to short nails for a while until I can strengthen them up. So no more long nails for a long while. :(

Holly Pedicure

Hey guys! I'm so sorry it's been so long since I last posted. I've had two Christmas designs all ready and set to go, but somehow time just snuck up on me. I meant to post them sometime within the last week or two, but seeing that Christmas is tomorrow, today's going to be a double post! Plus, I have a third manicure which I'll be rockin' tomorrow!

So this is the pedicure I've been wearing all month. It's so simple and clean, but still festive!


Basically, this is a simple french pedicure with two sprigs of holly that I painted, myself. Sorry about the low image quality on this one, but you get the idea. :(

Look for the other half later today! :D

***EDIT***
Oh no! It seems this image is broken. Thanks Kat S for pointing it out! I'll try to find the original as soon as possible. :(

Friday, November 12, 2010

TWLOHA Manicure

Today is the To Write Lover On Her Arms day on Facebook! This organization does wonderful work, so to show my support, today's manicure is dedicated to TWLOHA! I decided to paint awareness ribbons in the four colors they represent.


I also made a quick little video, so take a look!


Friday, November 5, 2010

Vertical Stripes (Manicure & Pedicures)

So for this post, I decided to feature some striped manicures and pedicures I've done recently. They are a super easy design to do. You can use sharpie, nail art pens, brushes, toothpicks and even the nail polish's brush. It's great for everyday wear and there are so many color possibilities! Also, one of the best things about vertical stripes is that they are great for short, broad nails. They give the illusion that your nails are longer and slimmer than they actually are! This also makes stripes great for pedicures, too. :)


I love black paired with bright colors. So for this manicure I used a black base coat with bright green, pink and yellow stripes. With the contrast against the black, the stripes really popped! They almost looked neon. :)


(sorry about the sideways picture! I couldn't orient it right for some reason...)

For this pedicure, I decided to go monochromatic. I think this was my favorite and most successful striped design. I used a light, medium and dark blue to do the stripes.


And then of course you can never go wrong with a good old fashioned rainbow! It looked great, and was very colorful!

I got a whole bunch of odds and ends to post this month, so look forward to a random November!

Sunday, October 31, 2010

Glow-in-the-Dark Spiderweb & Jack-o-Lantern Manicures

Well, I did a FANTASTIC The Nightmare Before Christmas themed video tutorial. Bad news is that my Windows Movie Maker keeps freezing up at 42% when I go to publish it. Ugh! Anyone know how to fix this?

Until then, I'll have to save that manicure for later. It's not in time for Halloween, but TNBC is fun any time of the year. So to make up for that and the lack of Halloween manicures, I have a double feature for you today! Here are two similar glow-in-the-dark Halloween manicures!

I decided to go with Jack-o-lanterns this year for Halloween. Very simple to do and they look fun! All you need is orange nail polish and a black sharpie or nail art pen.


(excuse the smudges)!!!

Build up a few layers of orange polish so it's nice and opaque. The draw on the little faces. Be creative! It's great practice for when you go to carve your own pumpkins! ;)

But, that's not all! These pumpkins also glow!!! I couldn't get a very good picture of the glowing, and my glow-in-the-dark polish was a little off this year. I think it's time to get a new one. :/


If you want your nails to glow and still be able to see the faces, you need to paint a glow layer after your orange and BEFORE you draw in the faces. This way your design will be on top and you can see it, even in the dark!

Last year I did a similar manicure. Instead, I used white nail polish and a spiderweb design. The principle is still the same though, draw on your design after you put a glow layer down. You can really use any color and any design you'd like! I, personally, think a bat would look awesome... ;)


Good news is that these two manicures work well on short nails, especially the pumpkin one (I dare to say I prefer it)! So fear not short nailed gals, you can rock nail art just as well! :D

So let's end on that note. Happy Halloween to everyone! Stay safe!

Monday, August 16, 2010

Pink Frog/Toad Manicure (Guest!)

Ok guys, hold on tight for this one! This manicure is a bit longer and has more steps than my others, but boy, did it turn out cute! Also, one of my best friends is modeling this manicure! She is mysteriously known as... 'Guestfingers'... *dun dun DUN*!

Lol, ok on to the manicure! :D


First off, I started by painting a pink base coat. On the ring fingers I painted a dark green.


After that, you'll be painting the frog's heads. To do this, simply paint a green oval about 2/3 of the way down the nail. Next, add two small circles on top of the oval to make the eye sockets. It's similar to a Mickey Mouse logo, but with the ears closer together. :)

After that, paint two white circles on the ring fingers to make the eyes for the toad. It's very important to let your nails dry at this point or you'll risk ruining them when you go on to do the details.


Now onto the detail work! Take your white and add two circles in the eye sockets that we painted earlier. On the frog, add two small black circles in the white ones for the pupils. Draw a thin black line below it for the mouth.

It's easiest if you have a nail art pen for this, but a sharpie marker is just as effective! I've tried sharpies before and my only warning is to make sure your nails are super dry or they will ruin them. Also, you may need two or three coats of sharpie to make it opaque.


After the black has dried on the ring fingers, draw a thin red or pink curvy line for it's tongue. I also added two small black dots for nostrils.


On the other fingers, take your black again and draw in the pupils. Draw a thin black line for the mouth and two small dots for nostrils.


Ta-dah! All done! It came out super adorable. Feel free to change background colors if you don't like pink or even experiment with the frog's expressions. 'Guestfingers' even wanted a little pirate frog on her pinky, haha!

Overall, the whole manicure isn't too hard. You just need some time and patience. :)

A very special thanks to the mysterious 'Guestfingers' for modeling! :D

Sunday, July 25, 2010

Sally Hansen - Hard As Nail Xtreme Wear - Review

Ok, now I know I said I wasn't going to do reviews, but I have a bunch of these and I found this line pretty interesting...

Alright, so I'm reviewing a few colors in the Sally Hansen's Hard As Nail Xteme Wear line. First, let's start with the disclaimer: I have not paid for these products; they were given to me by my mother. I am not being paid in any sort of way for this review and this is my honest opinion.

Not all the colors have the same, so I can't speak for every color in the line, but after trying 6 of them, I think I can give a fair review.


ALL of the polishes started off super watery. The brush isn't very good either and doesn't hold the polish, so you'll make a huge mess if you're not careful! After your first or second try, they level out to the consistency of normal polish.

That is, except the white. The white just sucks. It thicken up super fast and it's now like painting with paste. I've thinned it out twice already and it's started getting thick again. The white also looks flat like white out, so unless you like that sort of thing, I would NOT recommend the white. HOWEVER, it's very pigment and is the right consistency for a Konad. It's a perfect, cheap alternative.

The yellow and orange are super shear, so you'll need 5+ coats to get bottle color. Either that or layer it on top of a white coat. I suppose you could also try layering it ontop of another color if you want to experiment.

The green is nice, but it's starting to thicken up like the white, though not as quickly. It's pretty pigmented, opaque in thin 2 coats.

Marine Scene is really good, it reminds me of a peacock blue. It's a frosted with a little shimmer in there. It takes maybe 3 or 4 coats to be opaque, but it's wearable after 2. It's also great to layer on top of another color. I have a frosted green and I put a coat of this over it and it looks gorgeous!

And the best of the bunch is Blue Me Away... it really did blow me away! I have never been so impressed with a nail polish before! It was opaque in 1 coat, is pretty chip resistant, and super cheap! And I just LOVE the color! It looks great on cool skin tones and really jumps out! The only downside to this polish is that when you try to remove it with polish remover, it stains your fingers blue for a few hours. Otherwise, I think it's a great bang for your buck and I would definitely recommend this color! In fact I better go out and get another bottle soon! :D

Overall, they aren't a fantastic nail polish but not bad either. The bottles are small, BUT they are VERY cheap, ($2.50-$3.50ish at walmart and drugstores) so I think they are well worth a try! The color selection is also very good and they have some very unique shades. There aren't very many nudes or skin tones, so this is a line for a girl who loves color!!!