Showing posts with label tutorial. Show all posts

Monday, August 1, 2011

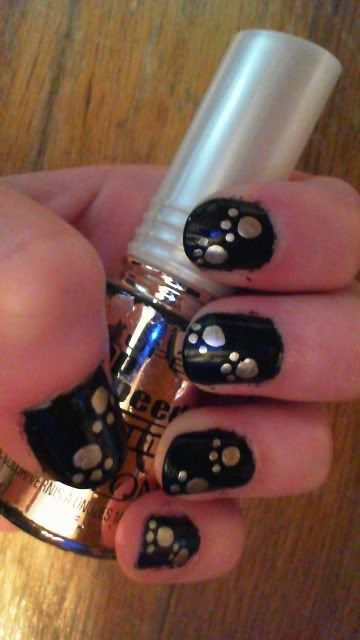
Paw Print Tutorial - Manicure

This one's for all the animal lovers out there! I'm a huge dog person and I'm in the process of getting a few rats. So in honor of our furry friends, here's a super easy, generic paw print manicure. :)


First, I started off with just a plain black background, but any color will do.
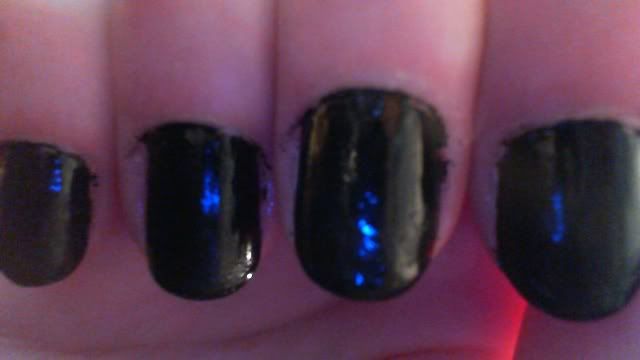

Next, make two or more large circles. I used the nail polish's brush for this part, but you can also use a nail art brush or toothpicks, which ever you're most comfortable with.
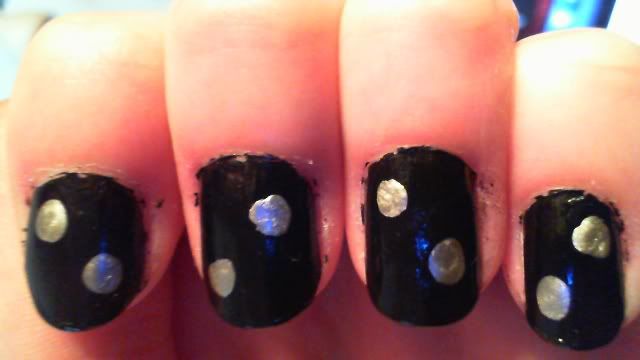


Finally, I added three little dots for the toes. Realistically, cats and dogs would have four dots, but I'm in the mood for a cartoony look. ;)


Finish off with a clear top coat and you're done! I think this one is great for short nails and pedicures, but I think it also works for long nails if you add more paws. And this pattern will work well for any colors so go ahead and mix it up! :)


(My dog, Jake. woof woof!)

Monday, July 4, 2011

4th of July Manicure

Happy 4th of July everyone!!!

So it's been a while since I've uploaded anything and even looonger since I've done a tutorial. So why not do one dedicated to the United States of America? Look at what manicure I'm sporting today! :)


Ok, first star off with a clear base coat of polish and paint your nails red.


Next, use either a toothpick, a striping brush, or thin paintbrush and paint white vertical stripes. If you're really careful, you can use the nail polish brush itself, it's just much more difficult.
*Optional* Paint your nails white with red stripes. :)


Next, you're basically going to paint blue french tips. Just use your blue polish and paint a smooth curved line at the tips of your nails.


Now to finish it all up, add some stars! Just make small white dots along the blue area. I did five stars on each finger, so there are 50 stars in total!


And it's that easy! Just finish up with a clear top coat to protect your patriotic manicure. I think this manicure looks great on short nails, but I'm sure it'll be fabulous on long nails too! :)

Friday, October 1, 2010

Halloween Skull Manicure

Hey guys! It's finally October, my favorite month! I have a few surprises in store for later, but for now, let's kick it off with a bang!


I made my first video tutorial! I'll be showing you how to make these adorable, spooky little skulls. They're perfect for Halloween later this month, or if you want to explore your gothy side. ;)


Enjoy the video and please leave some feedback! :D

Monday, August 16, 2010

Pink Frog/Toad Manicure (Guest!)

Ok guys, hold on tight for this one! This manicure is a bit longer and has more steps than my others, but boy, did it turn out cute! Also, one of my best friends is modeling this manicure! She is mysteriously known as... 'Guestfingers'... *dun dun DUN*!

Lol, ok on to the manicure! :D


First off, I started by painting a pink base coat. On the ring fingers I painted a dark green.


After that, you'll be painting the frog's heads. To do this, simply paint a green oval about 2/3 of the way down the nail. Next, add two small circles on top of the oval to make the eye sockets. It's similar to a Mickey Mouse logo, but with the ears closer together. :)

After that, paint two white circles on the ring fingers to make the eyes for the toad. It's very important to let your nails dry at this point or you'll risk ruining them when you go on to do the details.


Now onto the detail work! Take your white and add two circles in the eye sockets that we painted earlier. On the frog, add two small black circles in the white ones for the pupils. Draw a thin black line below it for the mouth.

It's easiest if you have a nail art pen for this, but a sharpie marker is just as effective! I've tried sharpies before and my only warning is to make sure your nails are super dry or they will ruin them. Also, you may need two or three coats of sharpie to make it opaque.


After the black has dried on the ring fingers, draw a thin red or pink curvy line for it's tongue. I also added two small black dots for nostrils.


On the other fingers, take your black again and draw in the pupils. Draw a thin black line for the mouth and two small dots for nostrils.


Ta-dah! All done! It came out super adorable. Feel free to change background colors if you don't like pink or even experiment with the frog's expressions. 'Guestfingers' even wanted a little pirate frog on her pinky, haha!

Overall, the whole manicure isn't too hard. You just need some time and patience. :)

A very special thanks to the mysterious 'Guestfingers' for modeling! :D

Wednesday, January 27, 2010

Labyrinth Inspired Manicure - FAIL!

So this is definitely not my best nail art... ok, fine. I failed completely. It's hideous, lumpy and just around bad. I can't imagine it would look good one anyone's nails. But I'm going to share it with you guys anyway so that it might inspire someone to build upon it and make it work. Don't say I didn't warn you!

I love the movie Labyrinth, I've been obsessed with it lately. So I wanted to do a manicure inspired by it. The colors that come to mind are purples and blues... and glitter!


So I got the brilliant idea to take those colors and mix them all together to look cloudy and mysterious...


...yuk. But, oh wait, it gets worse when I try to add those little floating crystal balls...


...
Yeah... I told you it was ugly!

I was really disappointed. It looked so much cooler in my mind... I'll probably attempt this one again some time in the future, but I'll used different methods. Anyway, I hope some good came out of this and someone finds a way to build off of it!

Thursday, January 21, 2010

Jefferson the Betta Fish Inspired Manicure

I finally found my camera cord. So here he is: JEFFERSON!


Jeff is a crowntail betta fish. He wasn't the most colorful, or most active, but he kept calling me so I took him home. Poor Jeff looked so sickly, but now he's all better! He's a little skittish, but his color has brightened up and he's swimming around more. So, I made a little Jefferson inspired manicure in his honor. :)

First I started off with a clear base coat. Next, I used a sheer french manicure nail polish; Any nude polish will do.


After letting that dry, I used a blue Sally Hansen nail art pen to draw wavy strings that resemble Jeff's fins. Like I've said before, a nail art pen is not necessary, a blue polish with a nail art brush or even a sharpie will work. If you do use a sharpie, make sure the nude polish is completely dry; otherwise the sharpie will drag the nail polish and ruin your manicure.


After that dried, I went over the tips of the blue "fins" with a red Sally Hansen nail art pen. It was my first time using the red and clue, and I was a little disappointed that the red was sparkly. I was expecting a solid red. And I certainly didn't expect the blue to be so matte! I do like it though...


Anyway, finish with a clear top coat and clean up stray polish. Viola!

Tuesday, January 19, 2010

Blue Snowflake Pedicure

Oops! I forgot to mention that I'll also be showing pedicures! Pedicure designs are especially great for girls with broad finger nails!


This is the current pedicure I'm wearing! All you need is a blue, white and a clear coat to make the polish last longer. I also used a coat of a glitter nailpolish, but this is optional.


Start off your pedicure with a base coat polish. I simply used a clear top coat for my base. It works just as well as a special base polish. Then I painted several coats of blue


Using a nail art brush, I painted a large white snowflake on my big toe. If you don't have a nail art brush, a skinny paint brush or a nail art pen will work just as well. If you don't have either, just use a tooth pick. I find tooth picks hard to draw clean straight lines with, but it can be done. You'll just have to be a bit more patient with it.


Paint small white dots randomly scattered on the other toes. I used a dotting tool, but toothpicks are WONDERFUL for this. I painted a coat of glitter polish on my toes, but that is optional for you. For me, it made the blue look a bit more frosty. Finish with a clear top coat!