Wednesday, January 27, 2010

Labyrinth Inspired Manicure - FAIL!

So this is definitely not my best nail art... ok, fine. I failed completely. It's hideous, lumpy and just around bad. I can't imagine it would look good one anyone's nails. But I'm going to share it with you guys anyway so that it might inspire someone to build upon it and make it work. Don't say I didn't warn you!

I love the movie Labyrinth, I've been obsessed with it lately. So I wanted to do a manicure inspired by it. The colors that come to mind are purples and blues... and glitter!


So I got the brilliant idea to take those colors and mix them all together to look cloudy and mysterious...


...yuk. But, oh wait, it gets worse when I try to add those little floating crystal balls...


...
Yeah... I told you it was ugly!

I was really disappointed. It looked so much cooler in my mind... I'll probably attempt this one again some time in the future, but I'll used different methods. Anyway, I hope some good came out of this and someone finds a way to build off of it!

Saturday, January 23, 2010

Black and Blue Wavy Manicure

I wanted to play around with the Blue Sally Hansen nail art pen some more. It was really interesting that it came out matte... So here's what I came up with, nothing special.


Basically what I did was paint my nails black, and draw in little squiggles. I fulled in the bottom half and toped it with a clear coat of nail polish.

I was a little disappointed that started to give a crackle look. You can see it best on my thumb and index finger. It even crackled a little worse after I took the picture. I don't know what that was all about, so I'll have to fiddle around with it a bit more.


P.S. Does this remind anyone else of the Backstreet Boys? XD

Thursday, January 21, 2010

Jefferson the Betta Fish Inspired Manicure

I finally found my camera cord. So here he is: JEFFERSON!


Jeff is a crowntail betta fish. He wasn't the most colorful, or most active, but he kept calling me so I took him home. Poor Jeff looked so sickly, but now he's all better! He's a little skittish, but his color has brightened up and he's swimming around more. So, I made a little Jefferson inspired manicure in his honor. :)

First I started off with a clear base coat. Next, I used a sheer french manicure nail polish; Any nude polish will do.


After letting that dry, I used a blue Sally Hansen nail art pen to draw wavy strings that resemble Jeff's fins. Like I've said before, a nail art pen is not necessary, a blue polish with a nail art brush or even a sharpie will work. If you do use a sharpie, make sure the nude polish is completely dry; otherwise the sharpie will drag the nail polish and ruin your manicure.


After that dried, I went over the tips of the blue "fins" with a red Sally Hansen nail art pen. It was my first time using the red and clue, and I was a little disappointed that the red was sparkly. I was expecting a solid red. And I certainly didn't expect the blue to be so matte! I do like it though...


Anyway, finish with a clear top coat and clean up stray polish. Viola!

Wednesday, January 20, 2010

Zebra Print Manicure

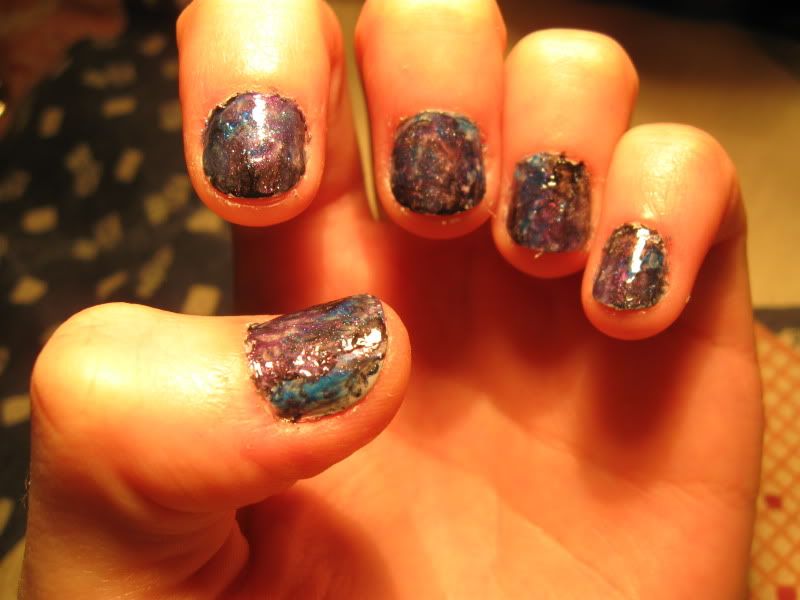
Well I got a new betta fish last night! He's still looking a little sickly, but he seems to be getting better now that he's all settled in his new tank. It was so sad going to Petsmart... all those poor mistreated betta fish... :(

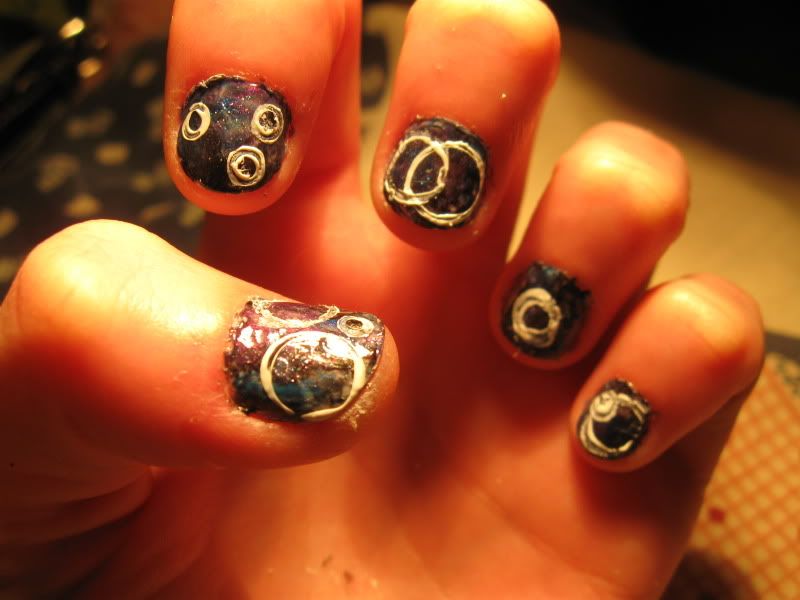
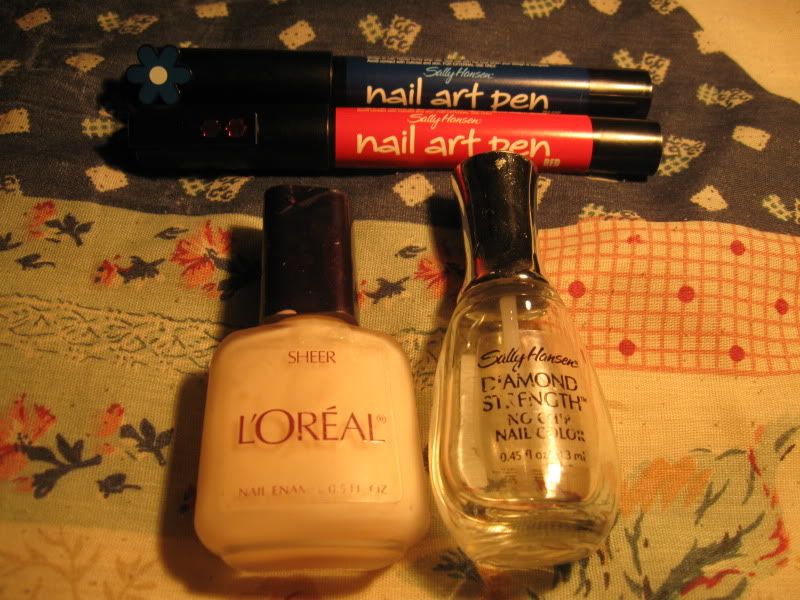
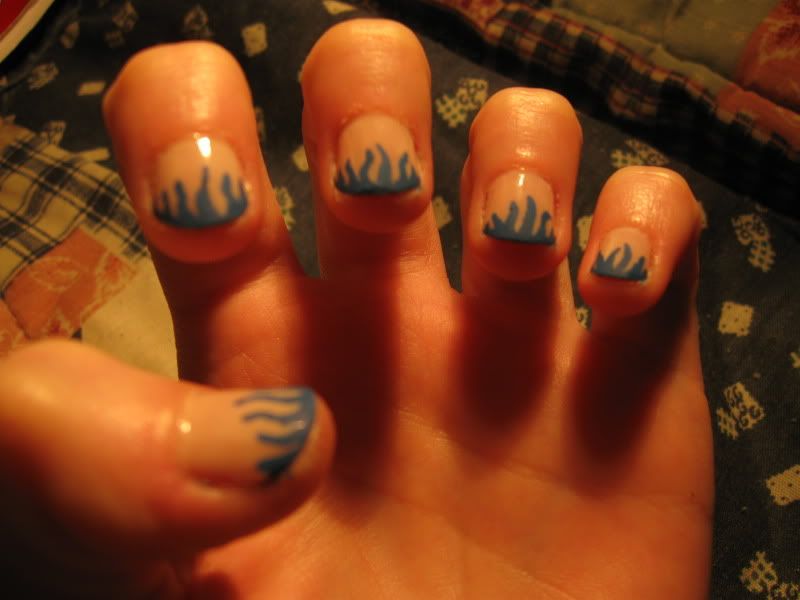
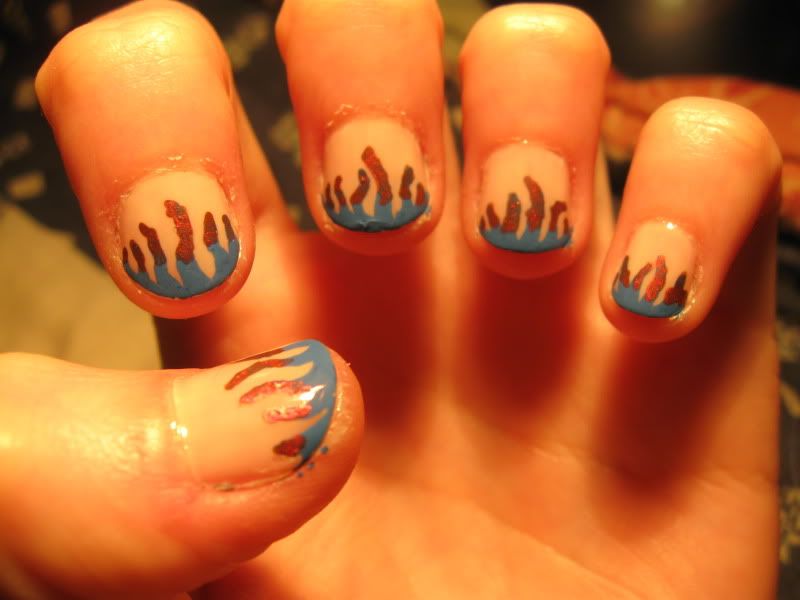
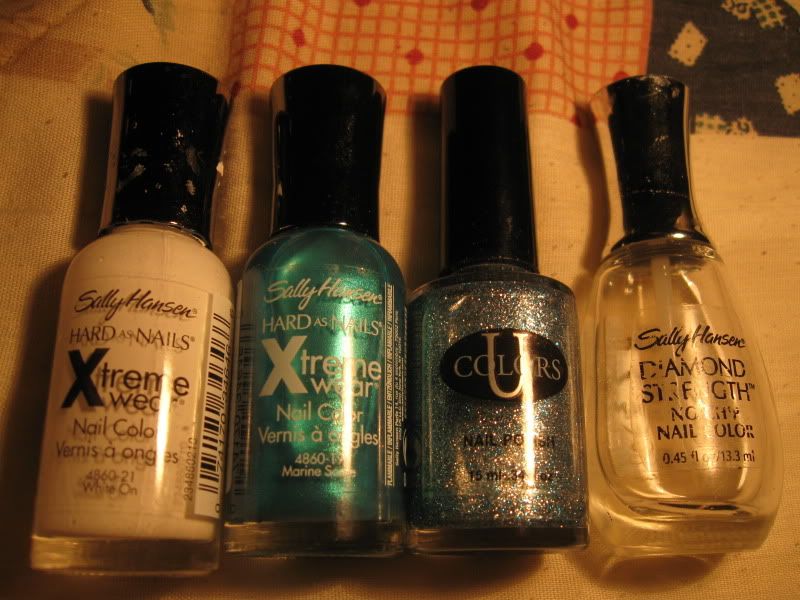
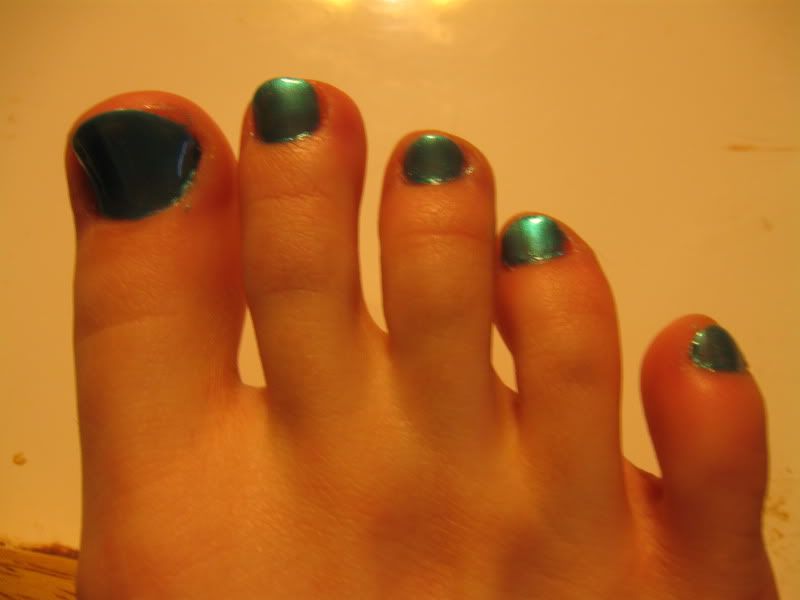
Well, at least this little guy's got a nice caring home now. I did a special manicure inspired by his fins! Unfortunately, I can't seem to find the cord that plugs my camera into the computer. I just had it yesterday, dangit!

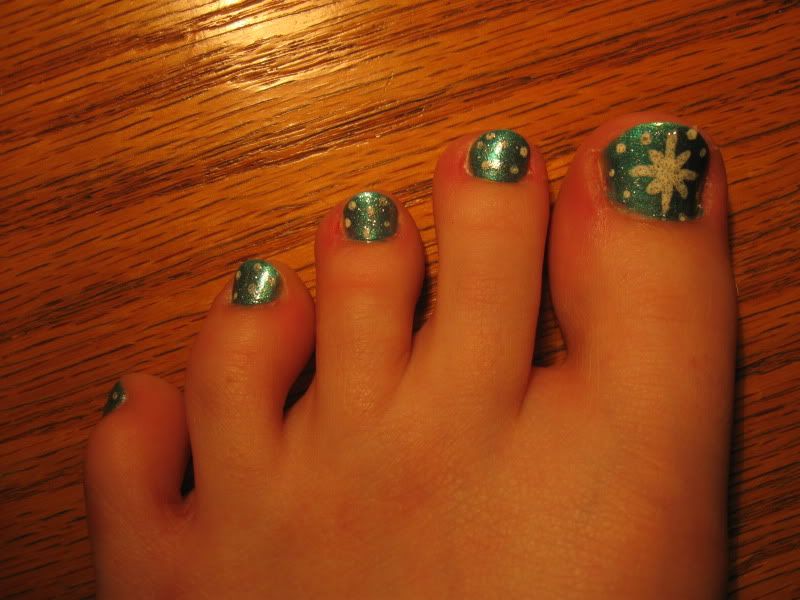
So in the mean time, let's tide you over with another animal!


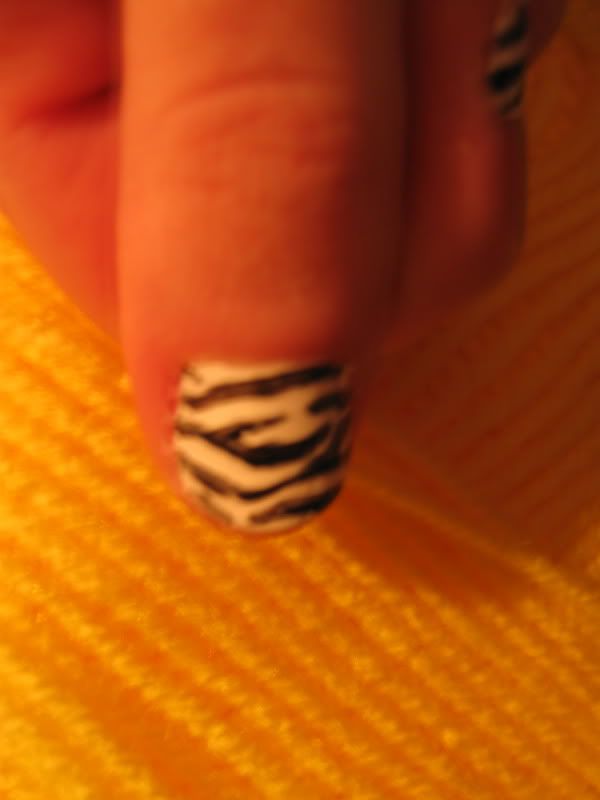
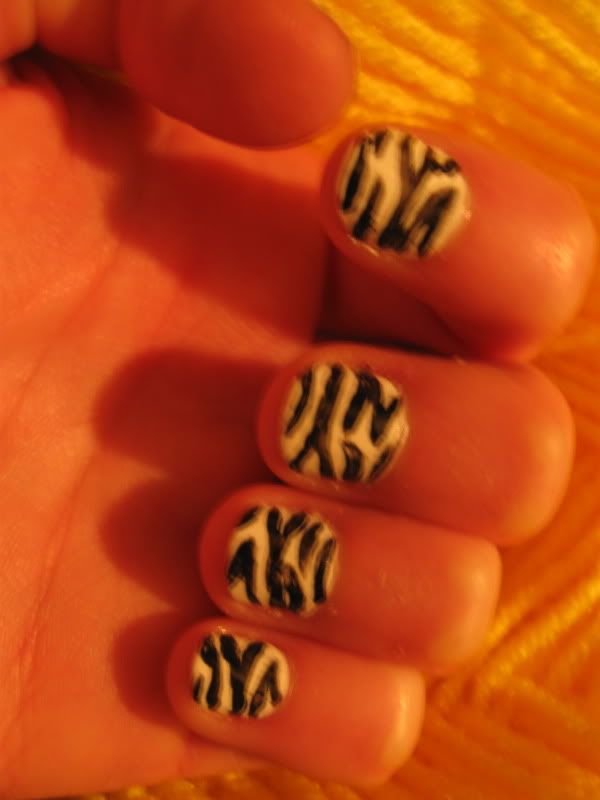
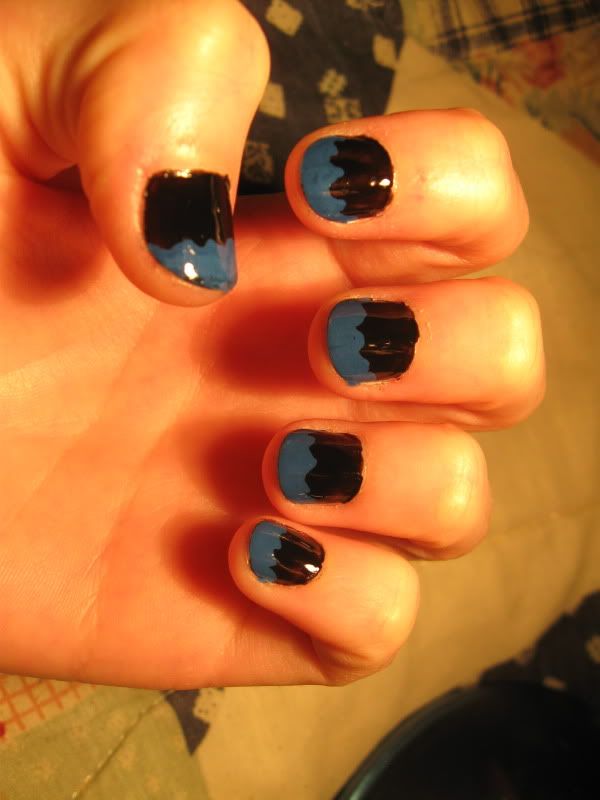
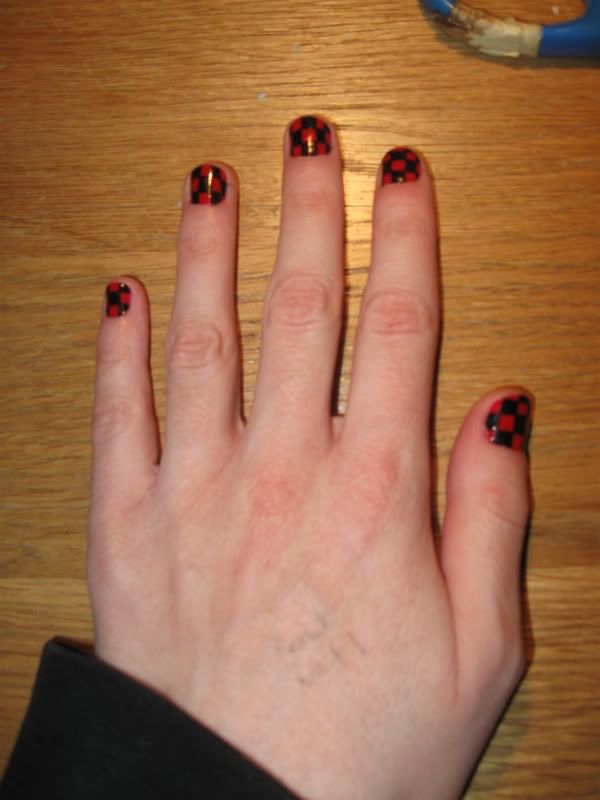
Just a simple zebra print. I appologize for the crappy photo quality. Not to mention my cheap clear coat smeared the black a bit... :(

This one is really easy to make. All you need is black and white. Clear base coat, then a coat of white. You may need more than one coat if it's not opaque enough. Paint in random black stripes and top it off with a clear coat
I used a nail art brush to paint in the black stripes. If you don't have one, a thin paint brush or black nail art pen will work just as good. Sharpies also work as well. Be careful though if you use a sharpie. The polish must be completely dry or the sharpie will drag the polish and ruin your manicure. Also, you may need to go over the stripes more than once to make it completely black. Normal nail polish is always a better choice; use sharpies only if you don't have the necessary supplies.

Just a few more tips. If you don't have a nice clear polish, like Seche Vite, you run the risk of smearing detailed designs like this. However, Seche Vite is a tad expensive. If you're using a cheaper clear coat, paint it on thick and it will be far less likely to smear.

Remember to vary the thickness of each stripe. It will help you make a more realistic pattern. Also, if you're uncomfortable painting on your own, google up a zebra print to use as a reference.

(Phew! that was a long one! Sorry about the text intensive post!)

Tuesday, January 19, 2010

Blue Snowflake Pedicure

Oops! I forgot to mention that I'll also be showing pedicures! Pedicure designs are especially great for girls with broad finger nails!


This is the current pedicure I'm wearing! All you need is a blue, white and a clear coat to make the polish last longer. I also used a coat of a glitter nailpolish, but this is optional.


Start off your pedicure with a base coat polish. I simply used a clear top coat for my base. It works just as well as a special base polish. Then I painted several coats of blue


Using a nail art brush, I painted a large white snowflake on my big toe. If you don't have a nail art brush, a skinny paint brush or a nail art pen will work just as well. If you don't have either, just use a tooth pick. I find tooth picks hard to draw clean straight lines with, but it can be done. You'll just have to be a bit more patient with it.


Paint small white dots randomly scattered on the other toes. I used a dotting tool, but toothpicks are WONDERFUL for this. I painted a coat of glitter polish on my toes, but that is optional for you. For me, it made the blue look a bit more frosty. Finish with a clear top coat!

Checkerboard Manicure


(Excuse the note I wrote on my hand!)

This was my first nail art design since I decided to create this blog, back at the end of October 2009. Just a simple checkerboard pattern. Unfortunately, this is the only photo I have of this design. To create it, I used a red nail polish for the base coat. I then drew the checkerboard pattern out with a black Salley Hanson Nail Art Pen that my mom gave me for the upcoming Halloween.

Questions? Leave me a comment! I would love to see you guys do different color variations of this!

DIYNAD IS OPEN!

Hello Everyone! My name is Serikiyo and this is DIYNAD - Do It Yourself Nail Art Designs!

Over the summer of 2009, I was casually searching around the internet looking for some way to spice up my nails. I came across Nevertoomuchglitter's Weblog and I suddenly found myself enthralled with the world of Nail Art!
I came across more and more beautiful websites dedicated to my new hobby. However, I started to notice a disturbing pattern. The vast majority of these sites featured two things that I lacked: long, slender nails, and a Konad.
That's when I was inspired to make this blog. I want to prove that even short, broad nails can be beautiful! I want to prove that you can make your own great nail art! No salons! No Konads! Just Your own creativity!

All nail polishes used in this blog I have bought on my own or have been given to me by family and friends. In no way am I being compensated other than the satisfaction I receive from helping you guys! If I've inspired you or any of your own creations, please, feel free to write to me!